
Drywall installation is one of the most common and crucial components of any home remodelling or renovation project. Whether you’re finishing a basement, creating a new room, or repairing damaged walls, the process of installing drywall can greatly impact the final aesthetics and structure of your space. While professional drywall installers ensure flawless results, having a solid understanding of the process can help homeowners make informed decisions or even tackle smaller projects themselves. In this guide, we share 10 essential drywall installation tips that balance DIY insights with professional standards.
1.Why Drywall Installation Matters in Home Projects
Drywall is the backbone of your home’s interior. Proper installation isn’t just about hanging sheets, it ensures soundproofing, energy efficiency, and long-term durability. Whether you’re renovating a single room or remodelling your entire house, understanding drywall’s role and correct handling is critical. Every layer you install or oversee contributes to the visual and structural integrity of your home.
What Is Drywall and How Is It Used?
Drywall, also known as gypsum board or sheetrock, is a panel made from calcium sulphate dihydrate, used to construct interior walls and ceilings. It’s lightweight, cost-effective, and easy to cut and install, making it a popular choice in home drywall installation projects. It serves both decorative and practical purposes, playing a critical role in interior architecture.
Why Drywall Installation Must Be Done Correctly
Improper drywall installation can lead to uneven surfaces, cracking, bulging, and even meld if moisture barriers aren’t properly applied. That’s why following proper drywall installation guidelines, or hiring a professional drywall installation company is essential. Well-installed drywall also helps maintain indoor air quality and energy efficiency.
Key Applications in Home Drywall Renovation Work
From finished basements to remodeled kitchens, drywall is a staple in modern construction. It supports electrical wiring, insulation, and often doubles as a fire-retardant barrier in critical areas of the home. Its flexibility and cost-effectiveness make it ideal for custom layouts and upgrades.
2.Essential Tools and Materials for Successful Drywall Installation
Having the correct tools and materials from the start can make or break your drywall project. It ensures safety, reduces waste, and leads to a more professional outcome. Preparation is key to reducing errors and improving efficiency.
Must-Have Drywall Tools
Essential tools include a drywall knife, T-square, utility knife, drywall saw, screw gun, and a drywall lift. Investing in quality tools helps ensure precise cuts and secure fastenings. These tools are vital for clean edges, accurate placement, and secure attachment.
Choosing the Right Drywall Type
Drywall comes in various types, standard, moisture-resistant (green board), fire-rated, and soundproof. Select the right type based on the room’s purpose, such as using green boards in bathrooms. Choosing wisely ensures durability and meets building codes.
Supporting Materials for a Flawless Finish
Other materials you’ll need include joint compound (mud), joint tape, corner beads, drywall screws, and sandpaper. For added soundproofing, consider using resilient channels or double-layered sheets. The right materials contribute to a smooth, professional finish.
3.Measuring and Cutting Drywall with Precision
Accurate measurements ensure the drywall fits perfectly, reducing the need for filler and rework. Mistakes in cutting often lead to wasted material and a poor-quality finish. Take your time during this step for best results.
Drywall Installation Tips for Measuring
Always measure twice and cut once. Mark each sheet clearly using a T-square and pencil. Use a tape measure to account for outlets, windows, and doors. Precision is key to avoiding gaps and ensuring snug fits.
How to Cut Drywall Without Damage
Score the drywall sheet with a utility knife along the measured line, then snap it along the cut. Use a drywall saw for interior openings like electrical boxes. Smooth edges with a rasp or sandpaper. Patience and steady hands help maintain board integrity.
Avoiding Common Cutting Mistakes
Cutting too quickly or applying too much pressure can damage the paper face or break the gypsum core. Always support both ends of the sheet when making cuts. A clean cut ensures better joint sealing and less waste.
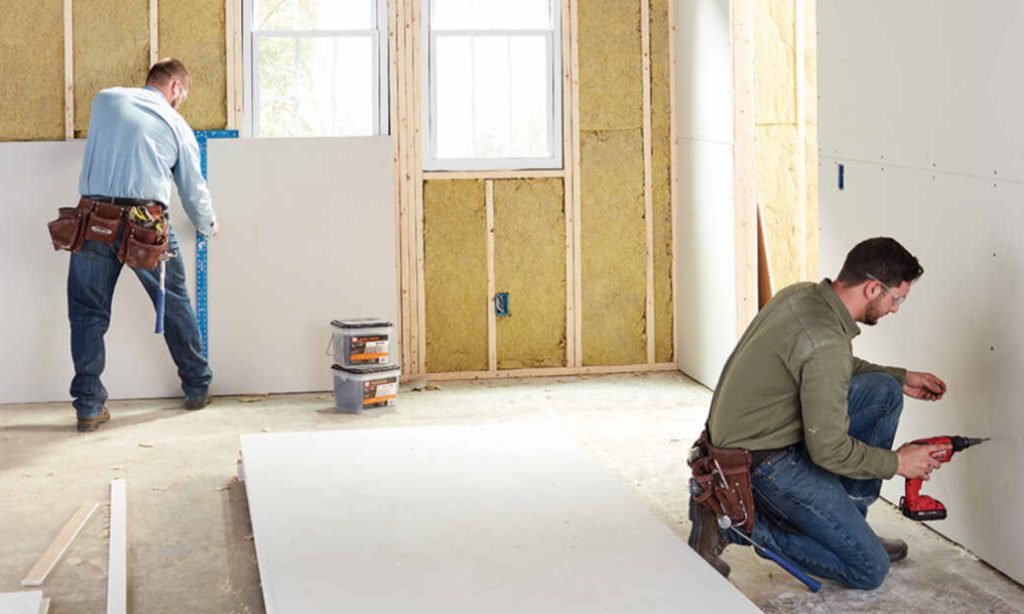
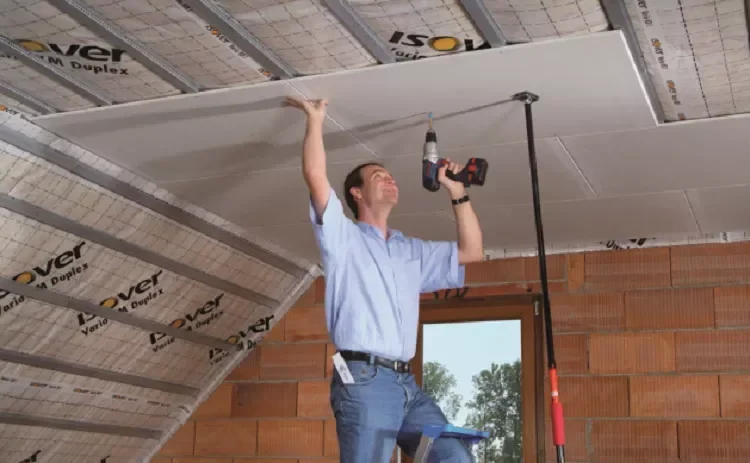
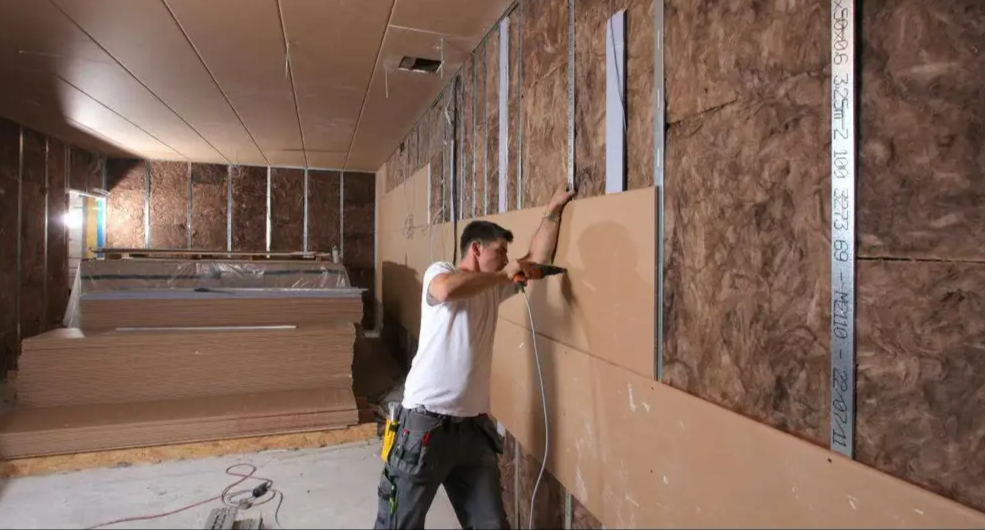
4.Hanging Drywall: Best Practices for Secure Installation
Proper drywall hanging is critical to achieving a level surface and preventing future issues. The approach you take impacts stability, visual appeal, and durability. Begin with a clear layout plan and enough help or tools to manage heavy sheets.
Horizontal vs. Vertical Hanging Techniques
For residential walls, drywall is usually hung horizontally to reduce seams. Ceilings should be hung perpendicular to ceiling joists for added support and reduced sag. Horizontal hanging also hides seams better behind furniture and decorations.
Securing Drywall Sheets Properly
Use drywall screws instead of nails to avoid future popping. Screws should be driven just below the surface without tearing the paper. Spacing should be 12–16 inches apart. Secure attachment prevents future shifting or sagging.
Tips for Working Solo
If you’re working alone, a drywall lift or T-brace can help you position ceiling sheets. Start with the top sections of the wall before moving downward. Preparation and mechanical assistance can make solo work safe and efficient.
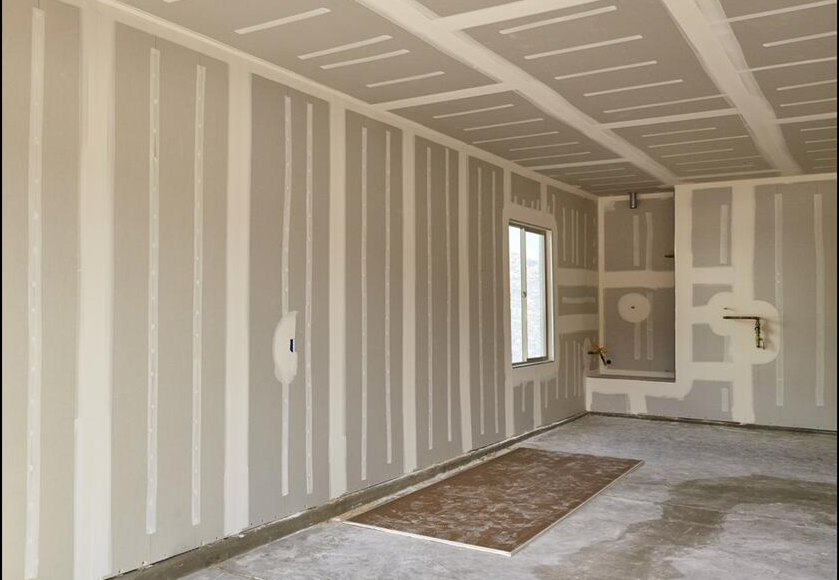
5.Taping and Mudding: The Art of Seamless Drywall Finishing
Taping and mudding are where skill truly shines. When done correctly, these steps create a seamless surface ready for paint or wallpaper. It’s a meticulous process but essential for a polished appearance.
Choosing the Right Joint Tape
Use paper tape for flat seams and fiberglass mesh for corner reinforcement or stress-prone areas. Paper tape is often preferred for a cleaner finish. The right tape prevents future cracking and improves bonding.
Applying Joint Compound Smoothly
Apply a thin first coat (bedding coat) with a 6-inch knife. Let it dry, sand lightly, then apply wider coats with a 10-inch and 12-inch knife, feathering the edges each time. Each layer builds a smoother finish.
Drywall Installation Tips for Smooth Finishes
Always let mud dry fully between coats. Sand gently with a fine-grit sanding sponge, and use a work light to check for flaws before painting. A flawless finish improves overall wall aesthetics.
6.Sanding Techniques for a Perfect Final Surface
Sanding is the final touch before priming and painting. Done properly, it gives your walls that polished, professional look. Don’t rush this step, it reveals all prior workmanship.
Manual vs. Power Sanding
Manual sanding with a pole sander or sponge offers better control for detailed areas. Use power sanders cautiously to avoid gouging the surface. Choose based on the size and delicacy of the area.
Dust Control and Cleanup
Use a vacuum sander or attach a HEPA vacuum to reduce dust. Wear a mask and protect furniture and floors with drop cloths. Cleanup is crucial for safety and professional-level results.
Checking for Flaws Post-Sanding
Run your hand across the surface to detect ridges. Shine a portable light at an angle to reveal shadows or uneven areas before moving on to paint. Inspection ensures your paint job looks perfect.
7.Should You Hire Professional Drywall Installers?
While some homeowners may feel confident tackling drywall, larger or more complex projects benefit from professional expertise. The difference in finish and efficiency is often significant.
When to Hire Professionals
If your project involves high ceilings, intricate corners, or tight timelines, it’s wise to hire professionals. They ensure code compliance and flawless finishes. Their experience minimizes risk and rework.
Advantages of Professional Drywall Installation Services
Trained crews can complete work faster and with better quality. They also bring specialized equipment and provide warranties on workmanship. Their knowledge leads to superior and lasting results.
Cost Considerations and Long-Term Value
Hiring professionals may seem more expensive upfront but saves money on corrections and ensures long-term durability, especially in resale scenarios. It’s a smart investment in your home’s future.
8.Painting Preparation and Priming for Drywall
Even a perfectly finished drywall surface can be ruined without proper painting prep. This step seals the drywall and sets the stage for a professional-quality paint finish.
Importance of Priming Before Painting
Priming is essential for sealing the porous surface of drywall. It ensures even paint absorption, prevents flashing, and improves adhesion. Skipping primer can lead to blotchy walls and early paint failure.
Types of Primers to Use
Use a high-build drywall primer-sealer to cover minor imperfections and provide a uniform base. If you’re painting in a humid area like a bathroom, choose a mold-resistant primer to protect the surface.
How to Spot Flaws After Priming?
Priming often reveals flaws that weren’t visible before. Use this chance to fill in dings or sand rough spots before applying your final coat. Lightly sand the primed surface for better paint grip.
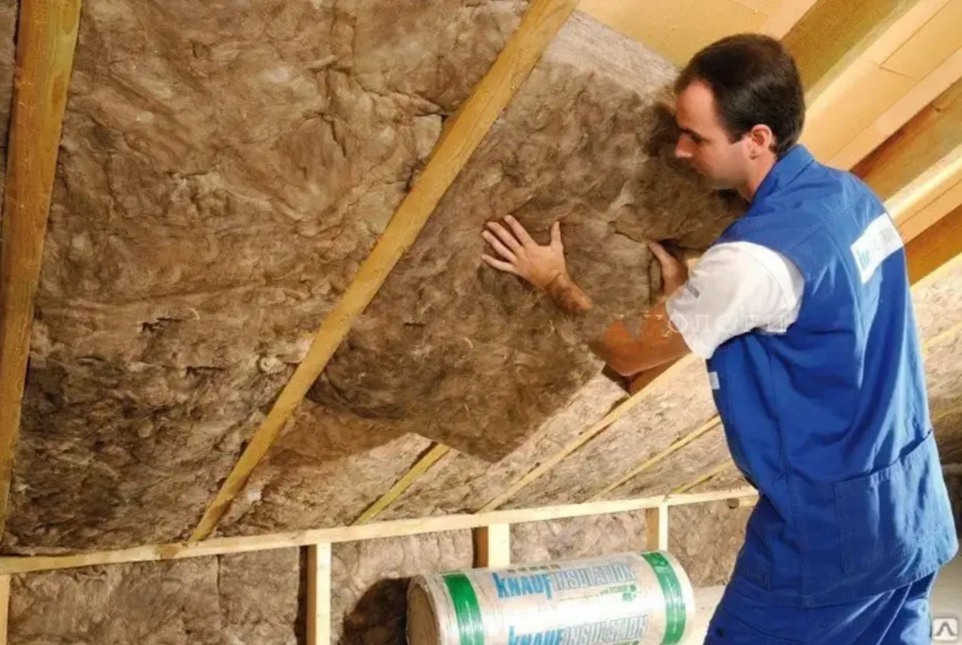
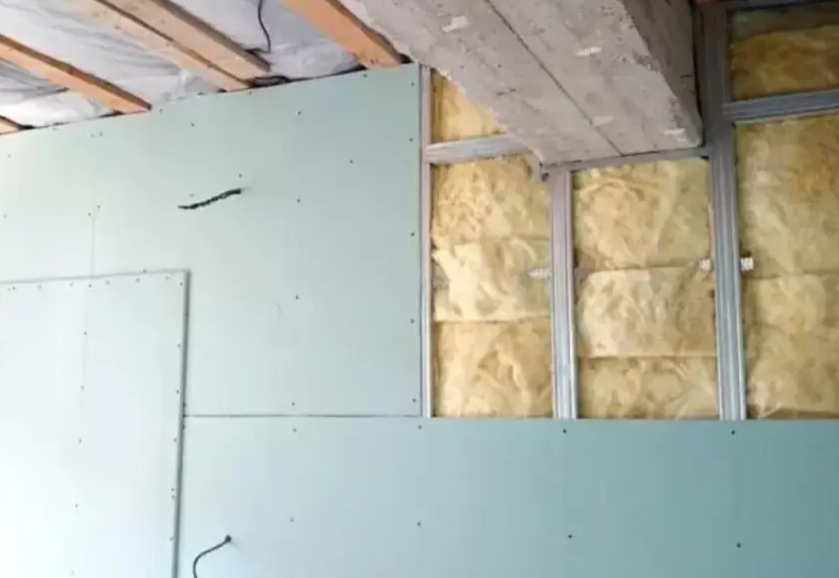
9.Moisture Management in Drywall Projects
Moisture is one of drywall’s greatest enemies. Managing humidity and water exposure is essential to protect the integrity of your installation, especially in basements, bathrooms, and kitchens.
How to Prevent Moisture Damage
Install vapor barriers behind drywall in moisture-prone areas. Use mold- and moisture-resistant drywall types and ensure proper ventilation during and after installation. Never install drywall directly against concrete walls.
Signs of Moisture Trouble
Look for bulging, mold spots, or soft areas in drywall as signs of moisture issues. Catching these early can prevent more extensive structural damage and health hazards from mold growth.
Best Drywall for Wet Areas
Green board and cement board are preferred in wet zones. Cement board, while heavier and harder to cut, offers superior water resistance for showers and laundry areas.
10.Safety First: Drywall Installation Safety Tips
Drywall work involves lifting, cutting, and exposure to dust, all of which pose potential hazards. Following safety guidelines helps prevent accidents and health issues.
Personal Protective Equipment (PPE) Essentials
Wear safety glasses, gloves, a dust mask (preferably N95), and hearing protection when using power tools. Steel-toed shoes and long sleeves also protect against dropped materials and abrasions.
Handling and Lifting Drywall Safely
Drywall sheets are large and awkward to carry. Use a drywall lift or get help from a partner. Always lift with your legs, not your back, to prevent injuries.
Dust Control and Air Quality
Work in a well-ventilated area and clean up regularly. Use dust extractors or vacuums when sanding, and seal off other rooms to prevent dust from spreading. Prioritizing air quality protects everyone in the home.
FAQs About Drywall Installation
Q1: How long does drywall installation take?
Small projects can take 1–2 days, while full-room installations may take up to a week including drying and sanding times.
Q2: Can drywall be installed in bathrooms?
Yes, but use moisture-resistant green board or cement board in areas exposed to water.
Q3: Is it necessary to prime drywall before painting?
Absolutely. Primer seals the surface and improves paint adhesion, ensuring a consistent finish.
Q4: Can I repair drywall myself?
Yes, small holes and cracks can be repaired with patch kits. Larger repairs may require professional help for seamless blending.
Q5: What’s the difference between drywall and plaster?
Drywall is faster and easier to install, while plaster offers a harder, more durable finish but is labor-intensive and costly.
Work with a Professional Drywall Installation Company: Total Paint and Remodel
Total Paint and Remodel is your trusted partner for expert drywall installation. Whether you’re renovating your home or constructing a new interior, our team provides:
- Top-rated Professional Drywall Installation Company services
- Cost-effective solutions from Affordable Drywall Installation Experts
- High-end finishes delivered by the Best Drywall Installation Specialists
- Custom Residential Drywall Installation Services for homeowners across the region
Our technicians use precision tools, premium materials, and years of hands-on experience to deliver flawless results, on time and on budget. Contact Roofing Inc MN today for your drywall remodelling and installation needs.
Conclusion
Drywall installation can seem daunting, but with the right guidance and expert tips, it becomes a manageable and rewarding project. Whether you’re tackling a DIY remodel or hiring professionals, understanding each step, from planning and cutting to taping and finishing, ensures high-quality results.
Partner with Total Paint and Remodel, the best professional drywall installation company, for expert craftsmanship, dependable service, and long-lasting interior upgrades.